
You must be eager to understand how to change sights on a bow. This article has various instructions that have been described in detail to ensure you get to understand the way of sighting a compound bow.
You must get to sight your bow effectively, especially when going out for a hunting mission. With an ell sighted bow, you will end up becoming more accurate and allowing for a better shot in sighting animals. Therefore, you will end up succeeding in your mission of putting down the animals faster.
When planning on getting a license for legally shooting of animals, you will own it to the animal to put it down in a humane manner and a rapid method as possible.
In dependence on experience and skill level, the sighting of a bow with a new sight will end up taking anywhere from around 30 minutes to one hour. Besides, the accurate shooting of bow is a tremendous and awe-inspiring skill when owned by any individuals. More also, it takes dedication and time to become proficient with the bow.
It is also a perfect and funny hobby for any individual as it will end up getting you outside to enjoy Mother Nature and even its finest. The methods discussed were raised from the various trials and errors that many people made.
Here are the steps needed to learn how to adjust sights on a bow:
- Checking Equipments.
- Stance.
- 20 Yards Sighting.
- Adjusting The Sights.
- Sighting In Cont.
Things You Will Require When Adjusting A Bow Sight

In the process of sighting a bow, there are certain things that you will be expected to have. With the set of required instructions ready, it will then be assumed that you will be prepared for sighting and tuning.
- Mechanical release(optional)
- Allen wrench set
- Shooting a target or block
- Arrows
A mechanical release will ensure you are having a consistent and more controlled release for the bowstring.
Checking Equipment
Before one begins shooting, it is a great thought checking over the item to detect the loose parts. Never even for a single day assume or forget that an accurate shot starts with consistency. Therefore, this implies that all the different shots taken should be aimed similarly. In case you are using free rest or sights shot, you will end up having a difficult time acquiring the sights zeroed in.
There are the methods to be followed to check the bow to see the loose parts.
- Wiggling the sights gently
- Shaking the rest gently
- Checking of alignment between the bowstring and the arrow sights
In case of any play in tightening up parts with the screw with the Allen wrench set.
Looking at the arrows to make sure they are not in any way damaged
What to Look For
- Checking to determine that the practice point is snuggly seat into the front of the arrow.
- Checking the fletchings for any cuts and nicks
Any minor discrepancies will end up affecting the arrow flight. In short distances, you will not end up noticing any difference in the arrow flight but even longer ranges.
With a longer arrow present in the air, you will end up getting a little flaw containing a more significant effect. Therefore, consistency is critical, as everything will be expected to be similar.
Stance

Just as said earlier, flexibility is essential, and the same need to be applied for all kinds of shots. The procedure to be taken in ensuring one gets the right stance involves:
- Standing comfortably and straight while the feet are perpendicular to one’s body.
- Holding of the bow similarly using the wrist in all the different shots.
- Bringing back the bowstring to a similar point on one’s face every single time.
When practicing day in day out, the three-step will be seeming as if they are being done in a single motion. In case you are a beginner, it will be a great idea to be wise in doing a mental checklist on the various steps that were mentioned previously.
A consistent anchor will ensure g you are looking at the various sights similarly in all the different shots. Varying individuals may end up having a small difference in their various anchor points.
To give you an illustration, you will be expected to anchor the point in the hook area between the index finger and the thumb behind the bowstring and the jaw bone, which will be touching the string. With continuous repetition, it will end up becoming a subconscious process.
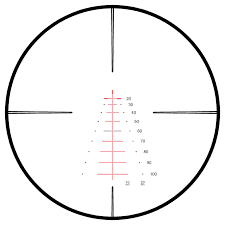
20 Yards Sighting
While shooting, ensure you are always in a safe environment. Therefore, ensure you are still aware of the target and the information which was beyond the given sight.
All the pins are designated for given yardage. With a three-pin setup, it will end up covering 20, 30, and 40 yards. After the competition of steps 2 and 3, the next thing will be proceeding to the target shooting arrows.
- The other pins will be moved down, and the focus will be on the 20-yard pin.
- Ensure you are shooting the target whenever it is safe for you to do so.
Adjusting The Sights
- the initial process, you will be taking some practice before you end up changing the sights. Ensure your arrow is grouping the target very carefully. When you get to determine where the arrow is going consistently, you will then end up adjusting the sight.
- Movement of the sight on the downside and will end up lifting the bow higher, thus resulting in shooting more top of the bow.
- Rising of the sight will lead to dropping the arrow angle leading to the lower shooting.
- Movement of the left sight pushes arrows on the right side.
- Movement of the right sight pushes to the left
Sighting In Cont
Right and left adjustment ought to be done. The first change is involving moving of the individual pin down and up to get zeroed at the 30 yards.
- Using a smaller wrench, you need to move the red 30 yards closer to the top of the pin.
- While ready, you will be required to shoot at the 30 yards.
- Adjusting the pin to get it into the right place.
Afterward, you will need to repeat the last step using a 40-yard distance to sight the yellow 40-yard pin. Always recall that you are moving the pin in up and down manner.
Congrats
After following the six steps discussed, you will have sighted the bow sight successfully.
Practice

There is the necessity of often practicing as much as you can use your bow, and you will end up becoming more accurate. Besides, your various groups will become even smaller as you will end up becoming much more consistent.
More also, a time may come when you will not be able to aim at one spot after every spot since the arrows will be hitting each other. Therefore, you will need to design at a different place to prolong the target life as well.
Conclusion: How To Adjust Sights On A Bow
You now have the various tips on how to adjust sights on a bow. Therefore in your next hunting attempt, you will be successful as long as you practice using the different tips in mind.

![Read more about the article Best Bow Stabilizer For Target Shooting [Perfect Accuracy]](https://valrin.com/wp-content/uploads/2019/05/target-shooting-300x225.jpg)